Let’s look at how you can use Gutenberg and Full Site Editing to create Breadcrumbs for your WordPress site.
What are breadcrumbs?
I am going to leave it up to AI to answer this question:
Breadcrumbs, in the context of web development and user interface design, are a navigation aid that helps users understand their current location within a website or application hierarchy. They are typically displayed as a horizontal trail of links, usually at the top of a page or just below the main navigation menu.
The term “breadcrumbs” is derived from the fairy tale “Hansel and Gretel” by the Brothers Grimm, where the characters leave a trail of breadcrumbs to find their way back home. Similarly, digital breadcrumbs provide a trail of links that users can follow to retrace their steps or navigate to higher-level pages.
ChatGPT
The rest of this post was written by humans, I can assure you!
The Recipe
In this example, we are not looking to add Breadcrumbs universally to all pages, but we will do so for a single template. Specifically, we will add Breadcrumbs to the Single post template.
You can replicate the steps shown below to achieve the same results for another template.
Ingredients
- WordPress site with Gutenberg and Full Site Editing
- The Icon Block by Nick Diego
Instructions
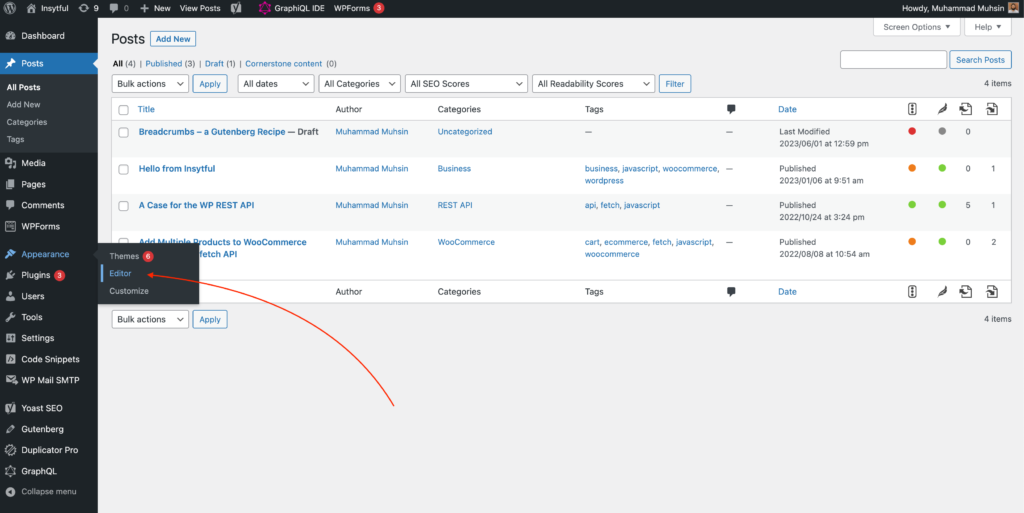
Head over to the Site Editor, which is located in the WordPress Admin’s Sidebar Menu under Appearances:
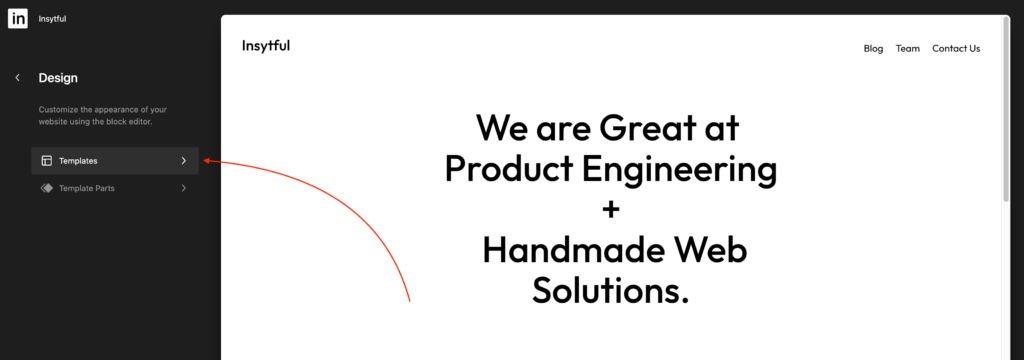
Click on Templates:
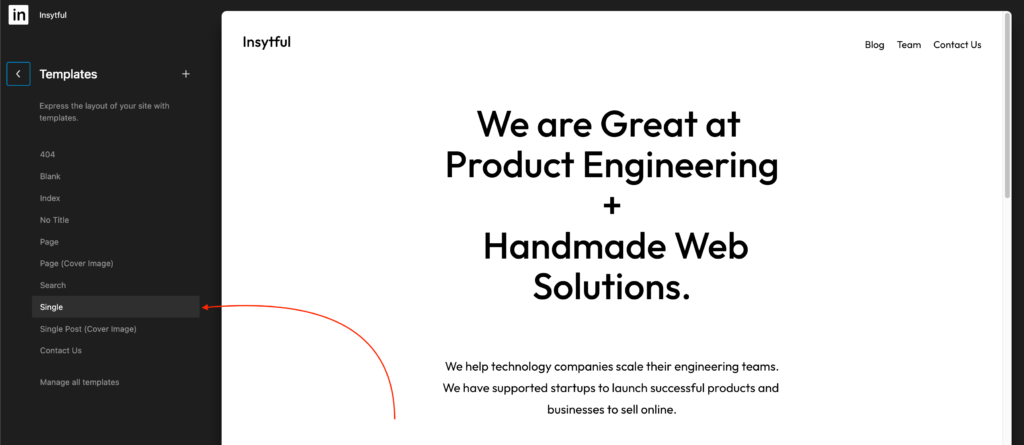
Now, you need to click on the template responsible for the current post type. In our case, it is called Single:
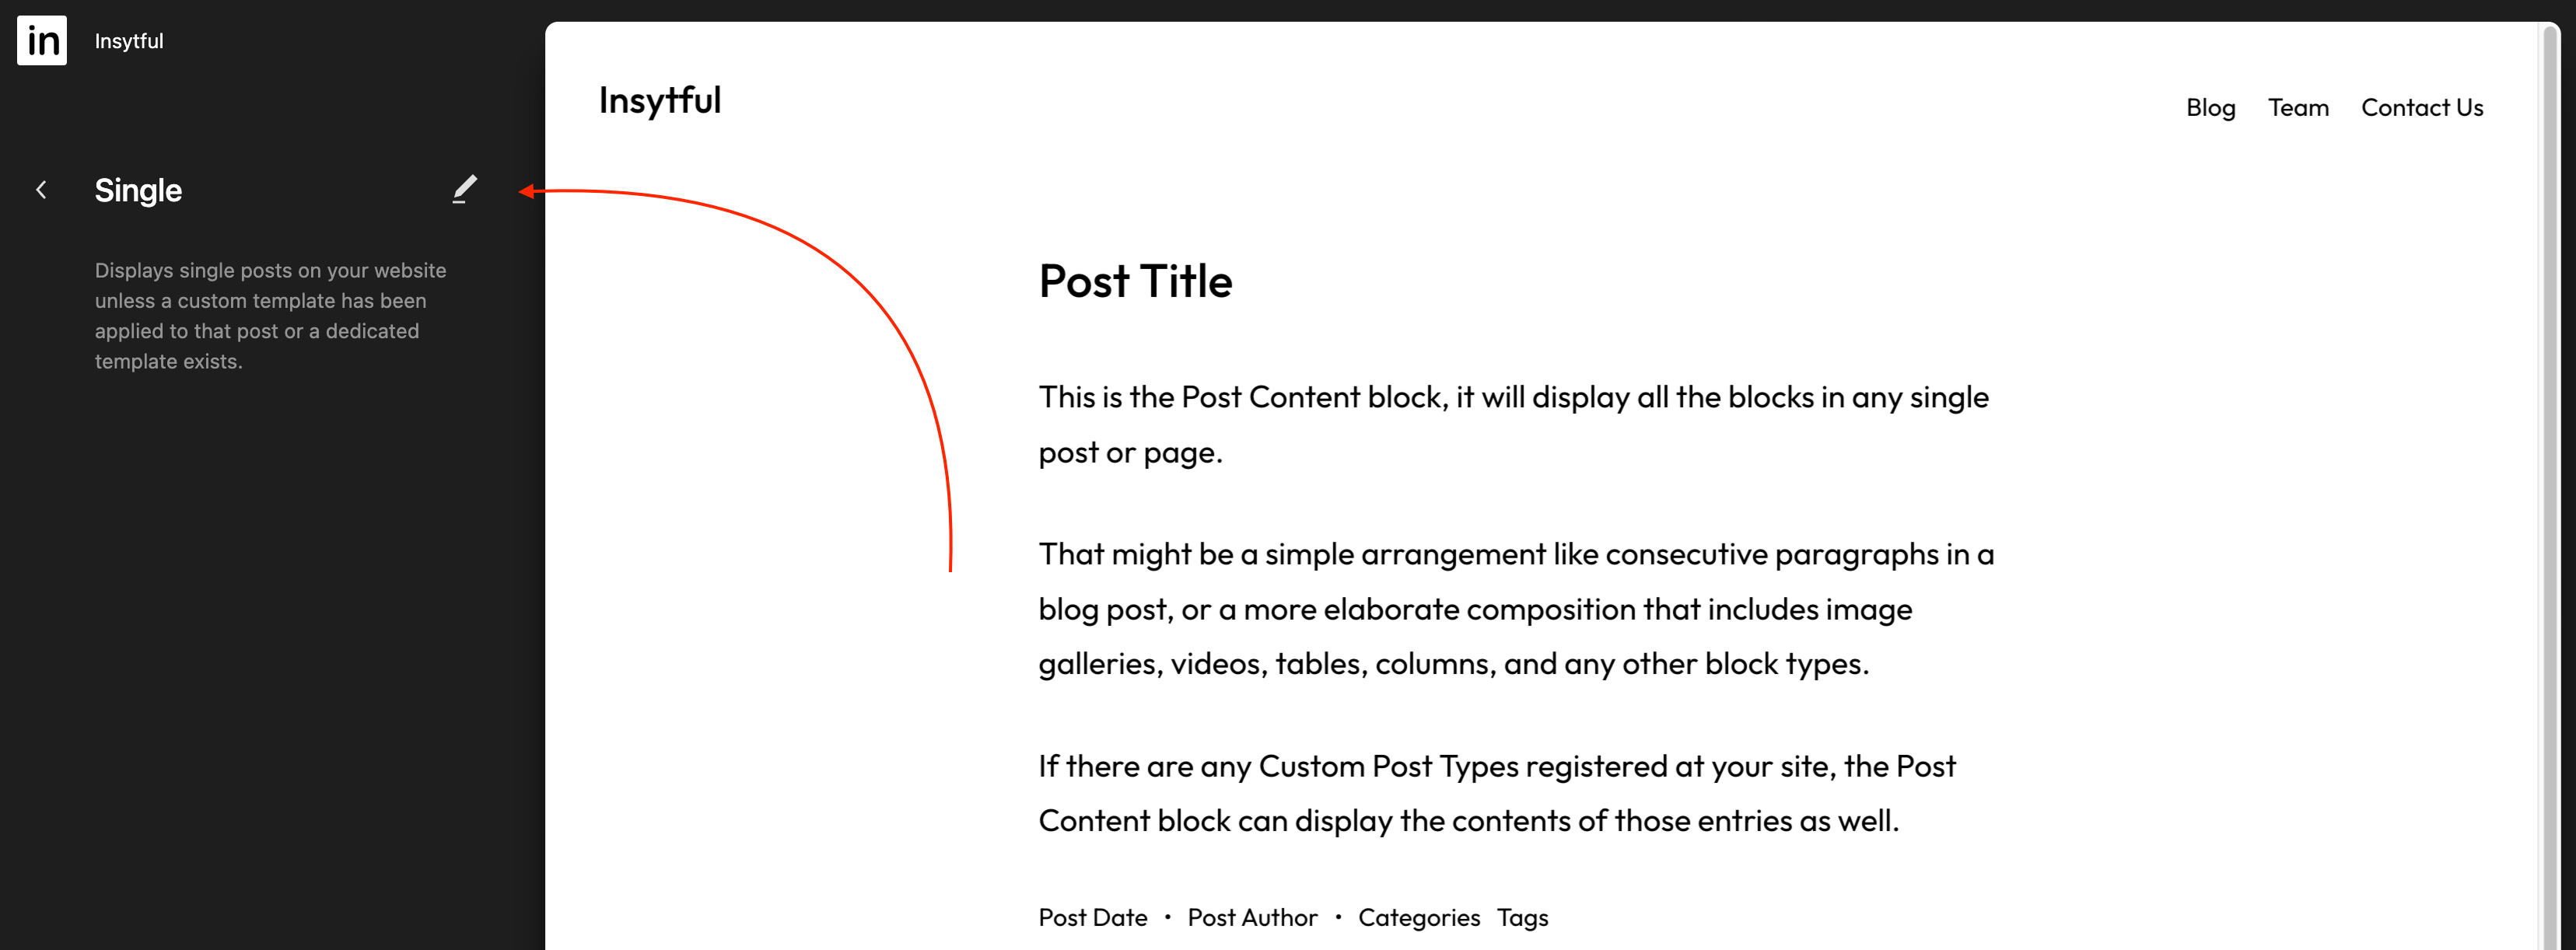
Having clicked on Single, you need to then either click on the center of the page or this icon:
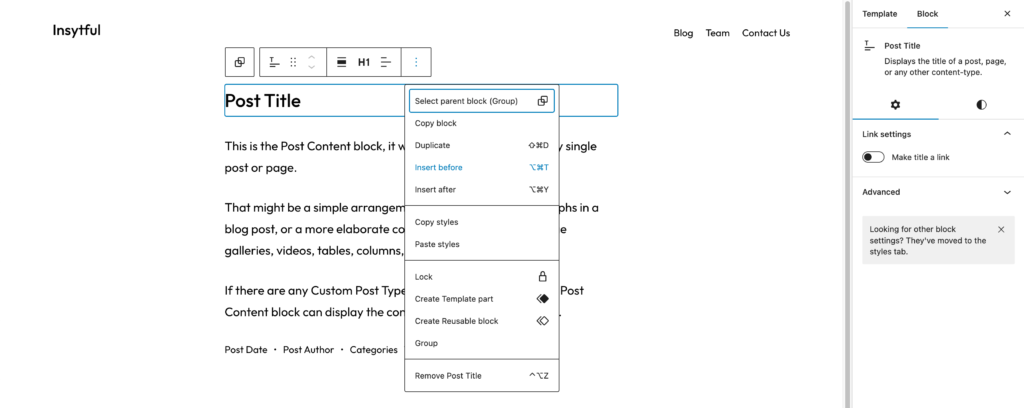
And then click on Post Title, then the button with the three dots at the end and then on Insert before.
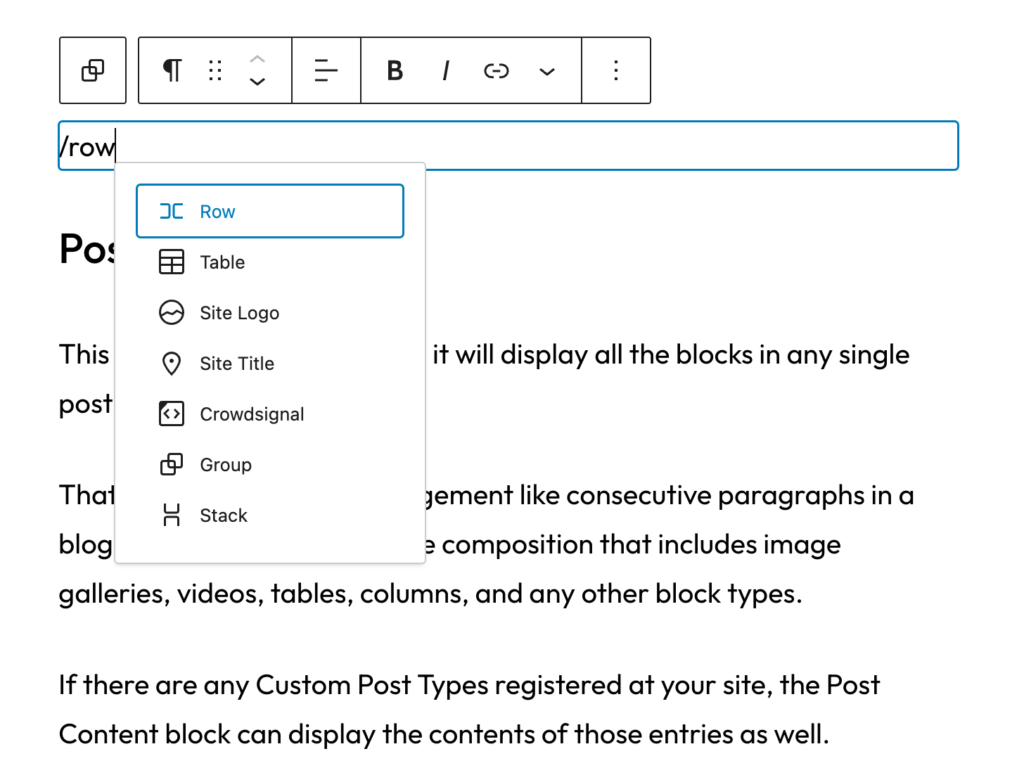
Now comes the meaty 🥩 part. Type / and then type row. You will get to select the Row block:
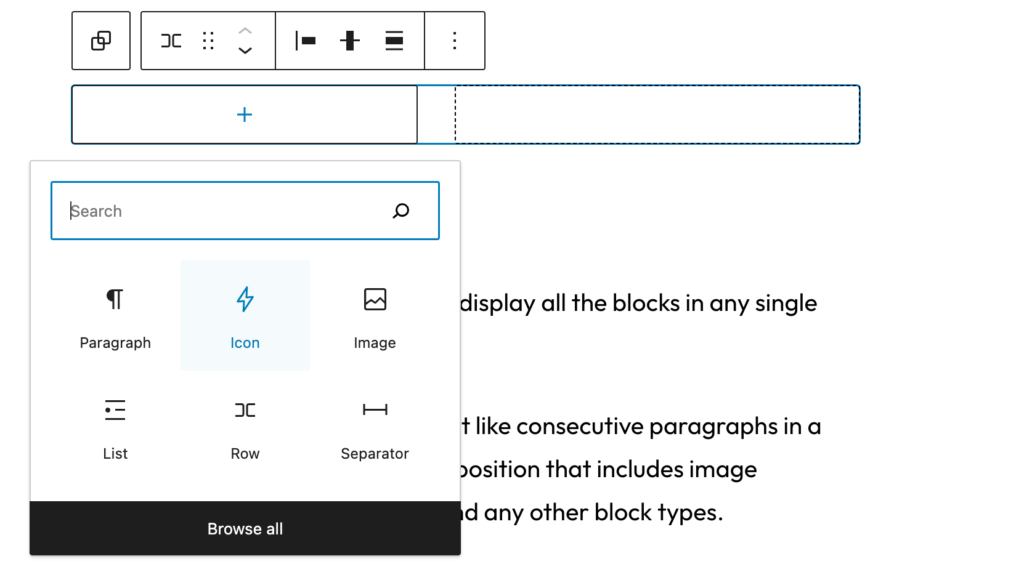
Click the + button on the Row block, and add an Icon block from the already installed Icon Block mentioned in “Things you need”:
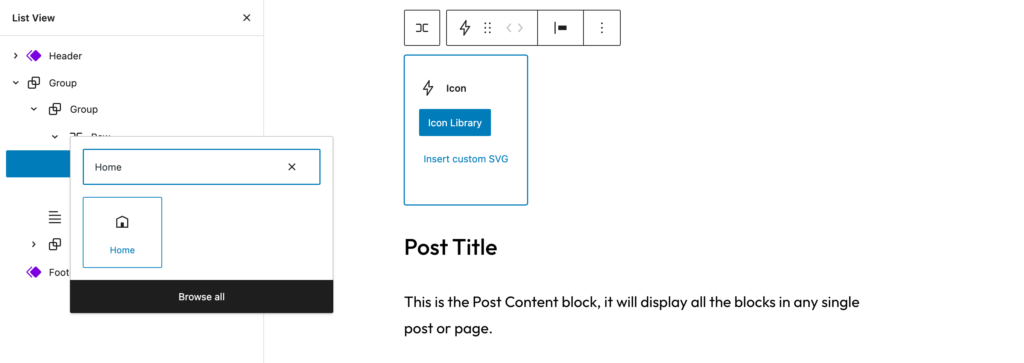
Now, click on Icon Library and select the Home icon:
Then add a link to the Home icon by clicking on the Link button and adding the / link to it:

Next, add a Chevron Right icon by adding the Icon block once again.
Then add the Categories block, followed by another Chevron Right as shown above:

Next, add a Post Title block, similar to the Categories block.
After you are done with all this, style as appropriate and then add a Separator below the Row block if desired.

Video
Here’s a short video detailing the steps above:
The Code
If you do not want to follow the steps detailed in the text or video but want to get it straight to your site, copy and paste the following code in your site editor at the place you want it to be:
<!-- wp:group {"layout":{"type":"flex","flexWrap":"nowrap"}} -->
<div class="wp-block-group"><!-- wp:outermost/icon-block {"iconName":"wordpress-home","iconColor":"secondary","iconColorValue":"#0099ff","linkUrl":"/","width":"24px"} -->
<div class="wp-block-outermost-icon-block"><a class="icon-container has-icon-color has-secondary-color" href="/" style="color:#0099ff;width:24px"><svg xmlns="http://www.w3.org/2000/svg" viewBox="0 0 24 24" aria-hidden="true"><path d="M12 4L4 7.9V20h16V7.9L12 4zm6.5 14.5H14V13h-4v5.5H5.5V8.8L12 5.7l6.5 3.1v9.7z"></path></svg></a></div>
<!-- /wp:outermost/icon-block -->

<!-- wp:outermost/icon-block {"iconName":"wordpress-chevronRight","customIconColor":"#7e7e7e","iconColorValue":"#7e7e7e","width":"24px"} -->
<div class="wp-block-outermost-icon-block"><div class="icon-container has-icon-color" style="color:#7e7e7e;width:24px"><svg xmlns="http://www.w3.org/2000/svg" viewBox="0 0 24 24" aria-hidden="true"><path d="M10.6 6L9.4 7l4.6 5-4.6 5 1.2 1 5.4-6z"></path></svg></div></div>
<!-- /wp:outermost/icon-block -->

<!-- wp:post-terms {"term":"category","style":{"elements":{"link":{"color":{"text":"var:preset|color|secondary"}}}},"textColor":"secondary","className":"text-decoration-none","fontSize":"small"} /-->

<!-- wp:outermost/icon-block {"iconName":"wordpress-chevronRight","customIconColor":"#7e7e7e","iconColorValue":"#7e7e7e","width":"24px"} -->
<div class="wp-block-outermost-icon-block"><div class="icon-container has-icon-color" style="color:#7e7e7e;width:24px"><svg xmlns="http://www.w3.org/2000/svg" viewBox="0 0 24 24" aria-hidden="true"><path d="M10.6 6L9.4 7l4.6 5-4.6 5 1.2 1 5.4-6z"></path></svg></div></div>
<!-- /wp:outermost/icon-block -->

<!-- wp:post-title {"style":{"typography":{"fontStyle":"normal","fontWeight":"400"},"color":{"text":"#4a4949"}},"fontSize":"small"} /--></div>
<!-- /wp:group -->

<!-- wp:separator {"style":{"color":{"background":"#a8a8a8"}},"className":"is-style-wide"} -->
<hr class="wp-block-separator has-text-color has-alpha-channel-opacity has-background is-style-wide" style="background-color:#a8a8a8;color:#a8a8a8"/>
<!-- /wp:separator -->
TL;DR
This post detailed how we can add simple breadcrumbs to our site via the Gutenberg Editor using core blocks and one externally installed block.
Hope you enjoyed this post, and stay tuned for more.


Leave a Reply